[C++] Split class and header to separated files with Visual Studio
Students have a habit of writing all their code in one single file. When you compile it, that file is huge, the program runs slowly, bugs creep in easily, and so on and so forth. So how do you split the pieces of your code into separate files?
- 1. What you shouldn’t do
- 2. What you should do
- 3. Example
- 4. Splitting a class into its own file
- 5. About using Namespaces
If you don’t have a background in object-oriented programming with C++ yet, come back to this blog as soon as you are ready.
1. What you shouldn’t do
Putting a class in its own file forces you to include the same library several times: in the separate file and in the main program
using namespace std;2. What you should do
You don’t have to do that. Including the same library twice causes errors.
Instead, in the class header file, add the following:
the libraries you need
your code
Then, in the main function, include the header.h file you just created
3. Example
To make it easier to picture, here are a few screenshots

Declaring the class in PhoneNumber.h

Then, in the file that defines PhoneNumber’s member functions, we include the PhoneNumber.h file

Finally, include it in the Main function. The program will run smoothly
There is another, newer and simpler way (but it requires Visual Studio 2005 or later as the compiler)
Add this line at the top of the .h file. It tells the compiler to include the libraries only once.
4. Splitting a class into its own file
To illustrate, I’ll create a simple MyInt class that represents an integer
First, start Visual Studio

Pick the Project type you want, give it a name and hit OK

Hit Finish in the Project creation Wizard

Then Visual Studio (VS)
creates a new project for you, with the name you gave it and stdadx.h as the precompiled header
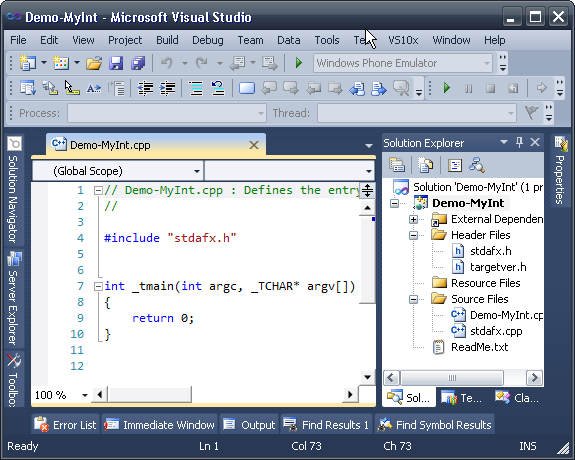
To add a new class the usual way, right click on Header Files, pick Add > New Item…

Pick Header File

Give it a name and hit Add

A brand new file named MyInt.h is created. This file is where the MyInt class is declared. You could also define the class in this file, but that is not recommended
// MyInt class declaration
class MyInt
{
private:
int data;
public:
MyInt();
MyInt(int);
};As you can see, we use the #pragma once technique to avoid including libraries too many times. In the same way, Add a new MyInt.cpp file in the Source Files folder


Then define the fields and functions of the MyInt class in the MyInt.cpp file
// MyInt class definition
using std::cin;
MyInt::MyInt()
: data(0)
{
}
MyInt::MyInt(int re)
: data(re)
{
}On line 7, because the MyInt class is declared in the MyInt.h header file, you have to include it in order to use it.
That’s it. There is another way to create a class in its own file using the VS Wizard. In the Header Files folder, right click and pick Add > Class…

Pick CPP class then hit Add

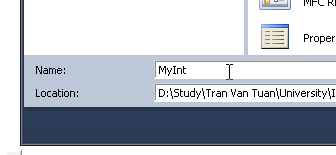
In the Wizard that shows up, you just type the class name, and the header file and source file names are filled in automatically

Hit Finish and right away 2 new files are created, with code already in them, placed in the matching folders

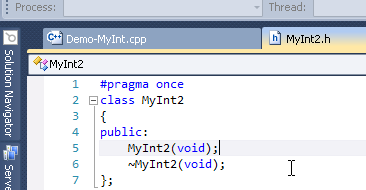
The generated code in the MyInt2.h header file
The generated code in the MyInt2.cpp source file
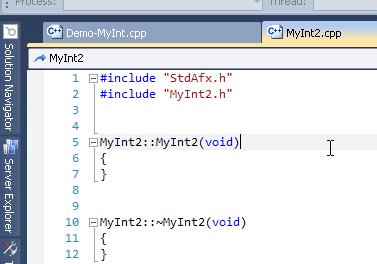
So everything we did by hand, VS does automatically — but it also generates some redundant code. Many developers don’t like that; they still prefer creating their class files themselves.
5. About using Namespaces
As mentioned above, when doing object-oriented programming with VC++ 2010, students usually #include a lot of unnecessary libraries and then write using namespace std;. That is not needed. The std namespace, that is STANDARD, has plenty of built-in functions you never use. Declare only the functions you actually use. For example, in the picture above I use cout, cin and endl, so I only declare those 3.
using std::cout;
using std::cin;
using std::endl;These 3 functions live in the iostream library. Some commonly used libraries:
stdafx.h– the standard one for VC++ 2010iostream– holdscout,cin,endlstring– holds the string handling functionsiomanip– holds the output spacing functions (setw,serfill)conio.h– holdsgetch(). This function is often used to pause the screen. But you shouldn’t use it.