[ASP.NET for Beginner] - Part 2 - Connect Database and Model Binding
In the previous part you got a basic idea of the MVC pattern. Building on that, we’ll continue with the database and the related topics.
See the posts in this series
Table of Contents
- 1. Picking a database
- 2. Entity Framework
- 3. Creating the Model and the Database
- 4. Model Binding
- 5. Model Binding
You can think of the database as the app’s heart and asp.net as its brain. Designing a database properly takes quite a lot of study + practice before your skills come up.
Another very good way is to get your hands on a real project. If you followed the previous part, you probably have a sample project named mvcbasic.
Overall you’ll have a project like this: MVC Basic 0.1 on Github
1. Picking a database
There are rather a lot of database management systems fighting it out on the market. Here I’ll go briefly over a few popular ones
1.1. SQL Server
Home-grown, free for individual users, high performance, powerful, a relational database system. Sql Server has proven its stability to every dev.
1.2. The others
Overall, Microsoft supports quite a few other database systems like MySQL, PostgreSQL and SQLite, but if you pick those, you’ll have to figure out quite a lot of problems yourself that are mostly already solved when using SQL Server
2. Entity Framework
One of ASP.NET’s strengths is Entity Framework (EF). In the core version there is also EF Core. Roughly speaking, EF is a toolset that lets you connect to a database and query, add, delete, edit and so on without needing to know how to write SQL.
Every upside has a downside: many people judge EF to be rather….slow. This has been and is being improved a lot in the new version shipping with ASP.NET Core, Entity Framework Core.
You need to install
- SQL Server Express
- SQL Server Management Studio (optional)
Installing the nuget packages
Open the mvcbasic project in vscode
Type the following commands one by one in the terminal
dotnet add package Microsoft.EntityFrameworkCore.SqlServer
dotnet add package Microsoft.VisualStudio.Web.CodeGeneration.Design
Then open the mvcbasic.csproj file and add the following
<ItemGroup>
  <DotNetCliToolReference Include="Microsoft.EntityFrameworkCore.Tools.DotNet" Version="2.0.0" />
</ItemGroup>
then type in the terminal
dotnet restore3. Creating the Model and the Database
There are 2 ways to start working with a database in asp.net core: Code first and Database first.
Briefly, Code first lets you write the code first (creating the model classes), and the models you create get pushed to the database through migrations. Database first is the traditional way we’ve always had: create the database first, and your code is responsible for ‘connecting’ to that database.
You can read more here: Code first vs Database first
3.1. Creating the Phone model
right click the Models folder > new file > Phone.cs
namespace mvcbasic.Models
{
    public class Phone
    {
        public int Id { get; set; }
        public string Name { get; set; }
    }
}
3.2. Creating the Database Context
You can think of the Database Context as a tool that lets your app connect to the Database and do the add/delete/edit work.
Create a new folder in the root named ‘Data’
Right click the Data folder > new file > MvcBasicDbContext.cs
namespace mvcbasic.Data
{
    using Models;
    using Microsoft.EntityFrameworkCore;

    public class MvcBasicDbContext : DbContext
    {
        public MvcBasicDbContext(DbContextOptions<MvcBasicDbContext> options) : base(options)
        {
        }

        public DbSet<Phone> Phones { get; set; }
    }
}
3.3. Setting up the Connection String
To connect to the database, Entity Framework needs information like the username, password, database name and the server hosting that database. All of those settings get merged into one string, and the world calls it the connection string
Open the appsettings.json file and add the following json
"ConnectionStrings" : { "PhoneDbConnectionString": "Server=(localdb)\\\\mssqllocaldb;Database=PhoneDb;Trusted\_Connection=True;" }The connection string above means: Server: LocalDb (a kind of local database available in newer SQL Server versions), Database: PhoneDb, connecting to the database with Windows Authentication
You may have to reconfigure this connection string to match your working environment
3.4. Setting up the connection
Open the Startup.cs file, find the ConfigureServices method and add the following line
services.AddDbContext<MvcBasicDbContext>(options => options.UseSqlServer(Configuration.GetConnectionString("PhoneDbConnectionString")));and remember to add 2 more usings
using Microsoft.EntityFrameworkCore;
using mvcbasic.Data;
3.5. Creating the first Migration
Once all the preparation is done, it’s time to create your first migration
In the terminal, type
dotnet ef migrations add InitialCreateVSCode automatically creates a folder named Migrations and adds a number of files to it
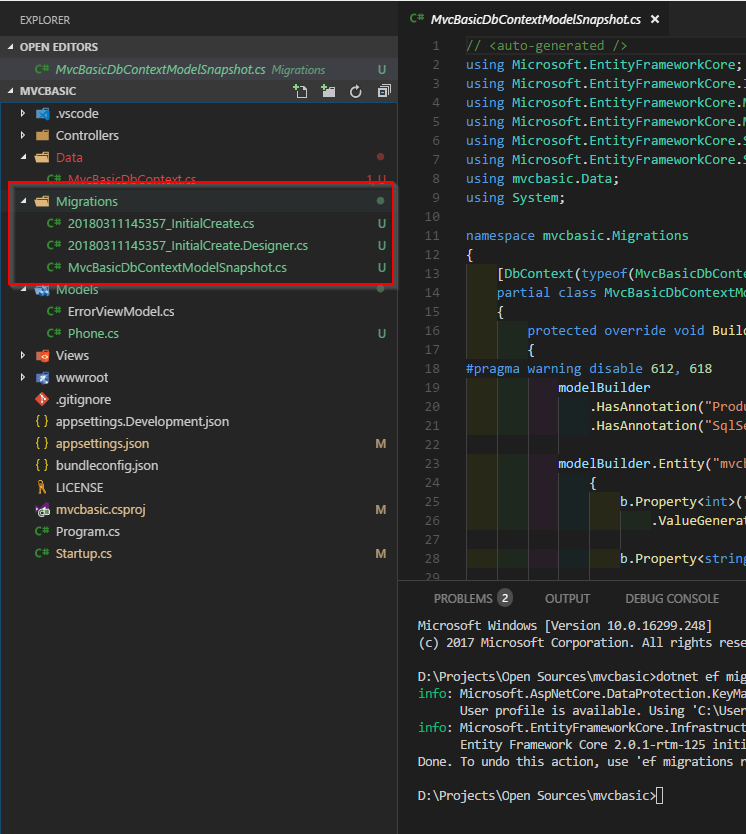
Then type
dotnet ef database updateand those migrations get executed, and the database is created
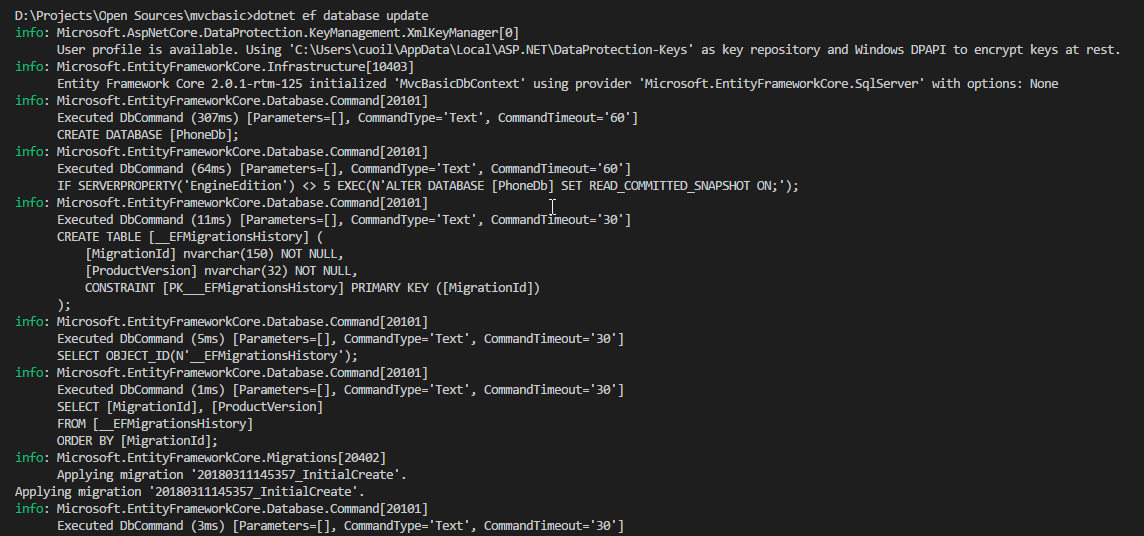
To check, you can use Microsoft SQL Server Management Studio with the following settings
- Server Name: (LocalDb)\MSSQLLocalDB
- Authentication: Windows Authentication
MSSQLLocalDB is your instance name; it may differ if you didn’t pick the default when installing SQL Server
4. Model Binding
After the steps above, your web app can basically connect to the database. But to do the add/delete/edit work you also need a Controller
You can download the project completed through step 3 here
4.1. Creating the Controller
VSCode also helps you automatically create the controller you want without writing much code (actually it isn’t VSCode helping, but a tool called the .NET Cli tools plus a few nuget packages that let you do this — but for now let’s just take it as is)
The Controller name, following the asp.net convention I mentioned in part 1, takes the form [Name]Controller, in this case PhoneController.
A common naming rule is
- Table name -> plural: Phones
- Model name -> singular: Phone
- Controller name: PhoneController
- View names: Create, Delete, Details, Edit and Index
4.2. The nugets you need
To create a controller you need a few more tools
Open mvcbasic.csproj and add the following lines
...
<PackageReference Include="Microsoft.VisualStudio.Web.CodeGeneration.Design" Version="2.0.2" />
...
<DotNetCliToolReference Include="Microsoft.VisualStudio.Web.CodeGeneration.Tools" Version="2.0.2" />
...
Overall, the csproj file looks like this
<Project Sdk="Microsoft.NET.Sdk.Web">

  <PropertyGroup>
    <TargetFramework>netcoreapp2.0</TargetFramework>
  </PropertyGroup>

  <ItemGroup>
    <PackageReference Include="Microsoft.AspNetCore.All" Version="2.0.5" />
    <PackageReference Include="Microsoft.EntityFrameworkCore.SqlServer" Version="2.0.1" />
    <PackageReference Include="Microsoft.EntityFrameworkCore.SqlServer.Design" Version="1.1.5" />
    <PackageReference Include="Microsoft.VisualStudio.Web.CodeGeneration.Design" Version="2.0.2" />
  </ItemGroup>

  <ItemGroup>
    <DotNetCliToolReference Include="Microsoft.EntityFrameworkCore.Tools.DotNet" Version="2.0.1" />
    <DotNetCliToolReference Include="Microsoft.VisualStudio.Web.CodeGeneration.Tools" Version="2.0.2" />
  </ItemGroup>

</Project>
4.3. Scaffolding
Open the terminal and type the following
dotnet restore
dotnet build

dotnet aspnet-codegenerator controller -name PhoneController -m Phone -dc MvcBasicDbContext --relativeFolderPath Controllers --useDefaultLayout --referenceScriptLibraries
Looking at that command you can probably guess what it does: “Hey dotnet, create me a new controller named PhoneController, using the Phone model, Data Context MvcBasicDbContext, in the folder named Controllers, with the default layout, and oh, with the scripts included”
The first 2 commands actually install the nugets and build the project once to make sure no errors crept in, and clear the temp files that are no longer needed
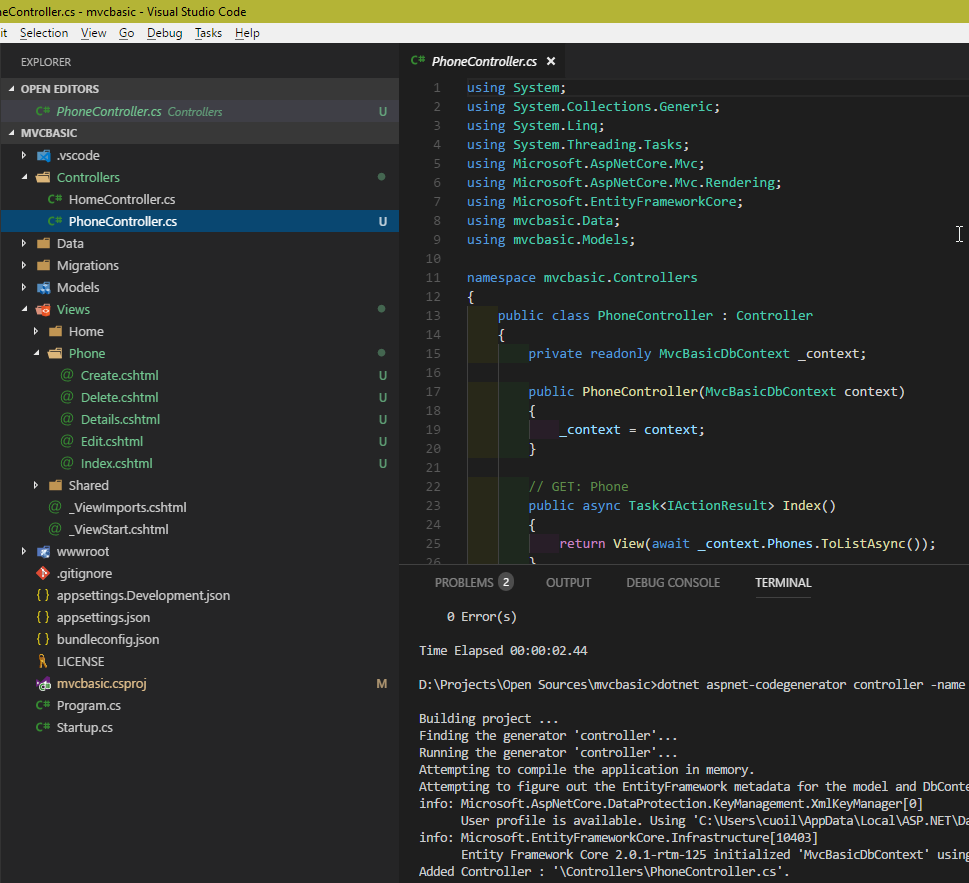
then type dotnet run to run the app
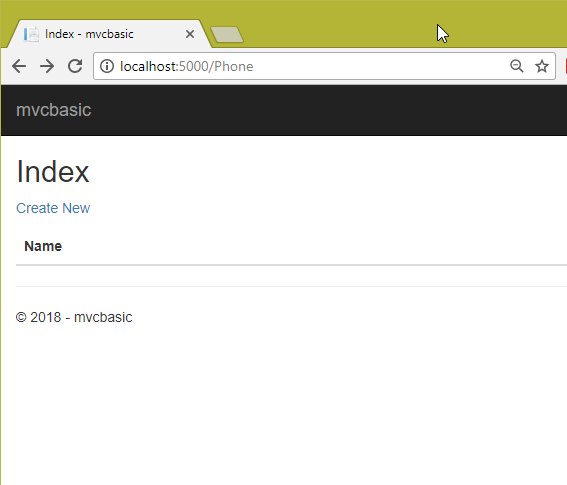
you can poke around with the links asp.net core generated for you — create new, edit, delete, details, whatever
5. Model Binding
Open the PhoneController file and you’ll see there is already code in it; not very pretty, but overall it works fine
Look at the Details method
// GET: Phone/Details/5
public async Task<IActionResult> Details(int? id)
{
    if (id == null)
    {
        return NotFound();
    }

    var phone = await _context.Phones
                              .SingleOrDefaultAsync(m => m.Id == id);
    if (phone == null)
    {
        return NotFound();
    }

    return View(phone);
}
This method takes one nullable int parameter named id; when you hit the url Phone/Details/5 (as in the comment above it), that 5 is understood as the Id. That is model binding
Next, look at the Create method with the [HttpPost] attribute
// POST: Phone/Create
// To protect from overposting attacks, please enable the specific properties you want to bind to, for
// more details see http://go.microsoft.com/fwlink/?LinkId=317598.
[]
[]
public async Task<IActionResult> Create([Bind("Id,Name")] Phone phone)
{
if (ModelState.IsValid)
{
_context.Add(phone);
await _context.SaveChangesAsync();
return RedirectToAction(nameof(Index));
}
return View(phone);
}Model binding is magical in another way too: if you use a whole class as the parameter, ASP.NET figures out the properties in that class on its own and assigns each value correctly
You can delete [Bind("Id,Name")] and the code still works fine, but as Microsoft warned, to protect you from over posting attacks you should spell out which properties get bound
This method corresponds to Views > Phone > Create.cshtml
<!--line 17-->
<input asp-for="Name" class="form-control" />
the asp-for keyword says that Name is the property that gets sent to the server, and the server “binds” it into the Create method’s phone model
Why is there no Id? Because Id is treated by default as the Phone table’s Key, and a key isn’t needed when creating a new row, since the database generates it
Next, open Views > Phone > Index.cshtml and you’ll see this code
@foreach (var item in Model)
{
    <tr>
        <td>
            @Html.DisplayFor(modelItem => item.Name)
        </td>
        <td>
            <a asp-action="Edit" asp-route-id="@item.Id">Edit</a> |
            <a asp-action="Details" asp-route-id="@item.Id">Details</a> |
            <a asp-action="Delete" asp-route-id="@item.Id">Delete</a>
        </td>
    </tr>
}
Huh, a foreach inside html? This language is called Razor; it lets you run some C# code inside html, helping render the html tags you want.
Razor is smart enough to figure out on its own which part is html code and which part is Razor code, with extremely simple rules
- Every piece of razor code starts with
@ - Right after
{or(you don’t need@
There is much more to say about databases and Model binding. For now let’s leave it there
Stay tuned for part 3 😃