[Visual Studio] Visual Studio have Super Power with help of Extensions
That’s right, you read it correctly. Visual Studio has superhero powers, and here is why I say it does.
This post covers tricks, utilities and how to use the extremely nice but fairly little-known features of Visual Studio.
1. Super Power 1: JetBrains ReSharper
ReSharper is a monstrously powerful extension from JetBrains. It takes on the job of cleaning up and dressing your code so it reads like poetry, boosting your productivity, improving maintainability and making code more reusable across different projects. Don’t believe me? Take a look at 1.4. The features
1.1. If you are a student
JetBrains ReSharper is free for students (they give away all their other products for free too). However, this free program is hidden pretty well on their home page.
- Go to this link: https://www.jetbrains.com/student/
- Hit Apply Now further down
- You have several options for proving you’re a student. The easiest: use an email ending in .edu

You can also use an international student card or documentation (which takes a bit longer)
- An email is sent to you with instructions for the next steps
1.3. Installation
Once you have the license, go ahead and install it. The installer is a bit over 100 MB. Close Visual Studio before installing.
After installing, open Visual Studio and you’ll see plenty of differences
1.4. The wonderful features
1.4.1. Code analysis
When you open a .cs file, ReSharper automatically analyzes the code in it and gives you sensible suggestions.
Look to the right and you’ll see the default scroll bar “decorated” with yellow, red and green marks all over. Those mark the “problematic” code.
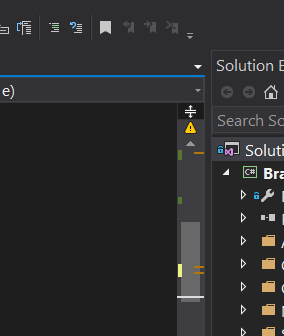
The vertical marks:
- Green: code that has been saved
- Yellow: code that was just edited or added and not saved yet
The horizontal marks:
- Orange: redundant code
- Red: broken code
- Green: code that can be shortened
1.4.2. Removing redundant code
Click one of the orange marks
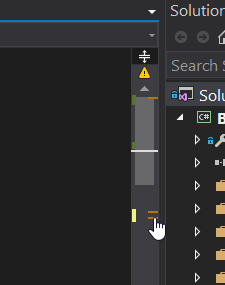
The cursor jumps straight to the spot where the problematic code is
Click the light bulb icon > pick the first line to fix the issue (in most cases the first suggestion is the most sensible one)
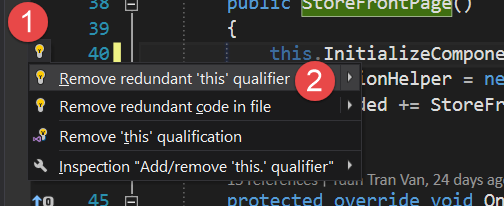
As in the picture above, the “this.” qualifier is redundant. ReSharper helps you remove this redundant “this”.
You can also do this removal in bulk. Click the small arrow next to the first line to see more options.
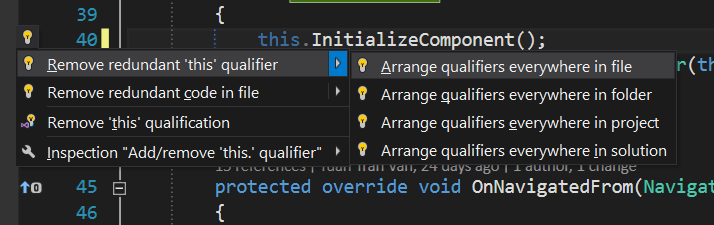
You can also try the 2nd suggestion: remove all redundant code in this file. You can click the arrow next to it to see more options
Visual Studio 2015 and later also has a few similar suggestions.
Point at the light bulb right below the code > Show potential fixes
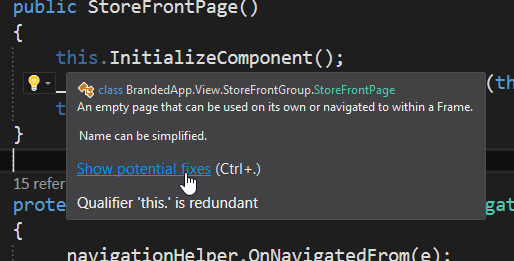
Personally I find ReSharper’s approach more modern and easier to read.
1.4.3. Standards-compliant code
ReSharper helps you write code that follows the standards, shortens code, replaces it with easier-to-understand code, and so on and so forth
1.4.4. Auto-completing code while you type
Say you want to declare a private string variable. You just type as in the picture below and hit “;”
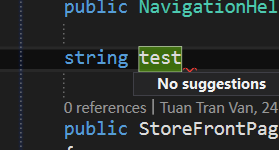
Say you want to use some method whose namespace you haven’t declared. In Visual Studio you have to type the full method name, then click a few times before Visual adds the namespace for you. With ReSharper you only type part of the method name. Once that method is highlighted in the suggestion list, you just type one of the special characters — a dot, a space, enter — and everything else is done for you.
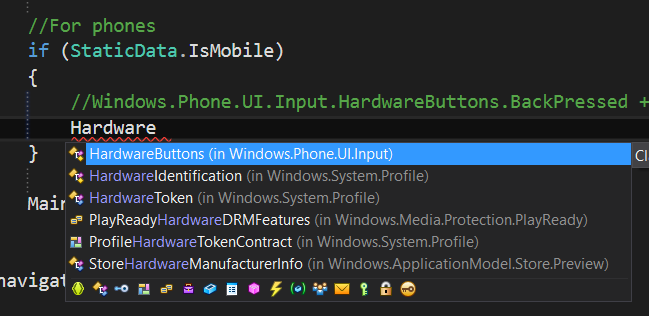
1.4.5. Shortening code
Click any green horizontal mark on the scroll bar. The cursor jumps to the line of code that can be shortened.
The code that can be shortened is underlined in green. Click it > click the light bulb > pick the first suggestion


The result

1.4.6. Generating code
Create a new model like this
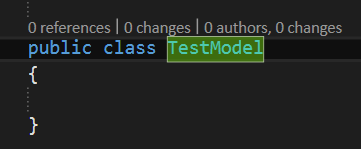
Declare its Interface as “INotifyPropertyChanged” (just type “INotiyPr” then enter and you’re done)
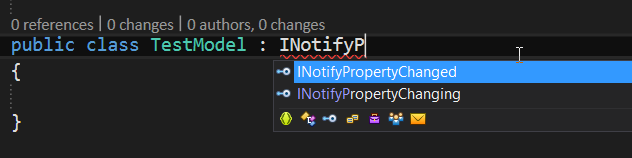
After hitting enter, the model is clearly missing a lot of important pieces of INotifyPropertyChanged.
Click the red light bulb > Implement INotifyPropertyChanged
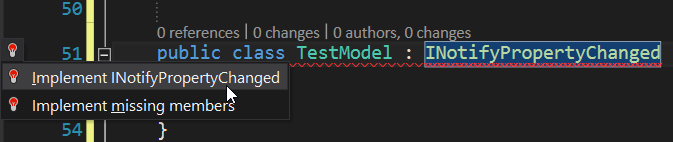
And the result (the first time you do this, ReSharper asks permission to add a few files to the Properties folder. Just allow it)
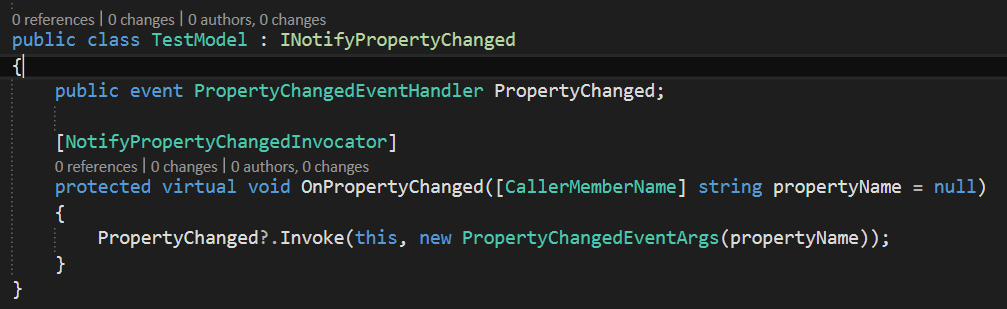
1.4.7. Code Generation
Using TestModel, add a few throwaway variables to test the Code Generation feature
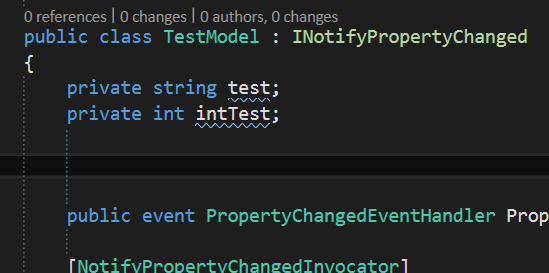
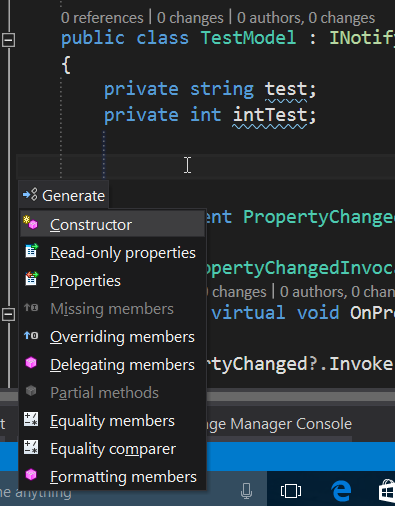
Go to the ReSharper menu > Edit > Generate Code… (this menu sits in the same row as File – Edit – View - …)
A small box shows up; pick Properties
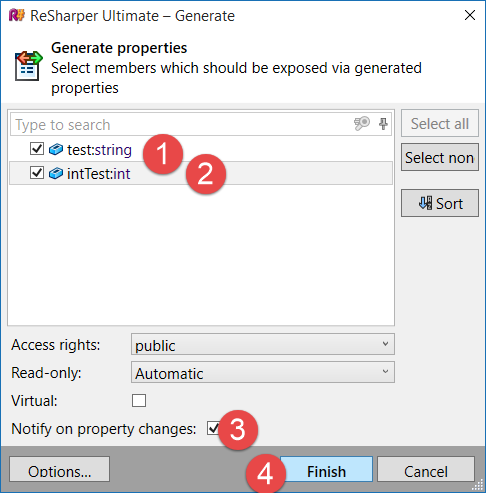
Pick all the fields you want Properties for > also tick Notify On Property Changed (handy for the MVVM pattern) then hit Finish
The result:
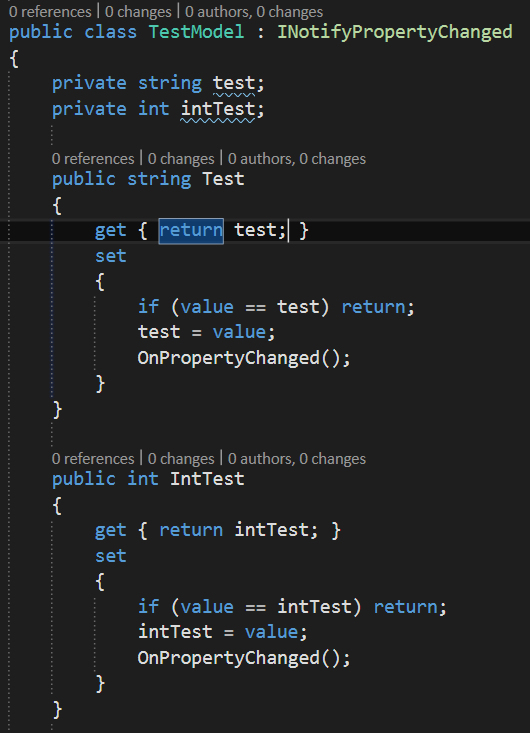
Great, isn’t it?
1.4.8. Renaming classes – methods – functions, and so on and so forth
ReSharper helps you rename anything, and that new name is applied in every file that uses it. Say this TestModel class is used in 3 files and you want to rename it to NotTestModel: all 3 of those files get the new name.
Put the cursor on the TestModel class name
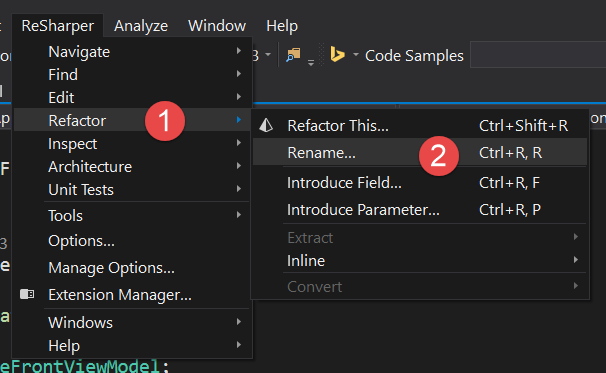
Pick the ReSharper Menu > Refactor > Rename…
A small dialog shows up
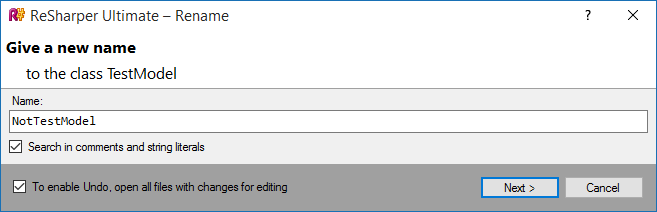
Change the name. If you want the Undo feature, tick the box below and hit Next
1.4.9. Moving a string into the Resource
Those of you building apps with Localization (aka: translating the strings in the app into different languages for different markets) are surely suffering when you have to move string after string into the Resource for translating. Some people do it incrementally, adding strings to the Resource as they go, with the Resource file always open. Others finish the app first and then move each string into the Resource by Copy > Paste, very much by hand
And then the hero ReSharper appears.
To move a string into the Resource, put the cursor on that string and pick the ReSharper menu > Refactor > Move…
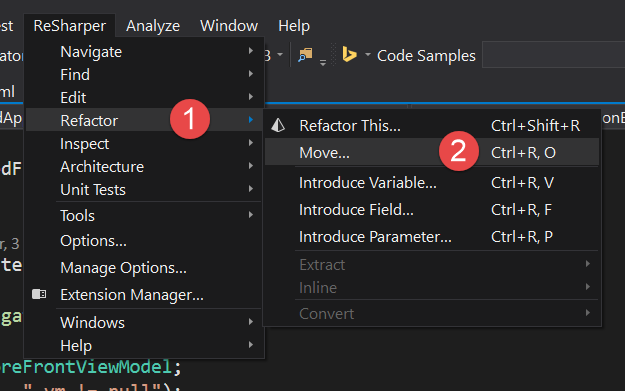
A small dialog shows up. Here you can choose and change the settings
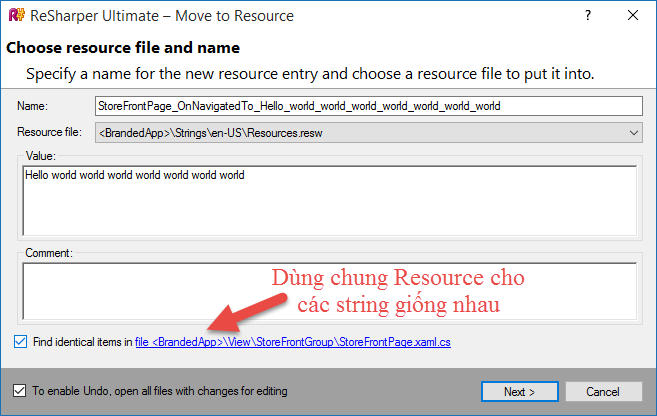
Hit Next and admire the result

That said, this GetValue Method is out of date, so you have to tweak it a bit like this

this feature works for strings in XAML code too
ReSharper has rows upon rows of other features waiting for you to discover
2. Super Power 2: XAML Styler
Have you ever been annoyed writing UI code in XAML, with the attributes all running along one line, scrolling back and forth exhaustingly?
Have you ever looked at a pile of XAML code and had no idea where to find the property you need?
XAML Styler has arrived. And it will help you format your XAML code beautifully.
2.1. Installation
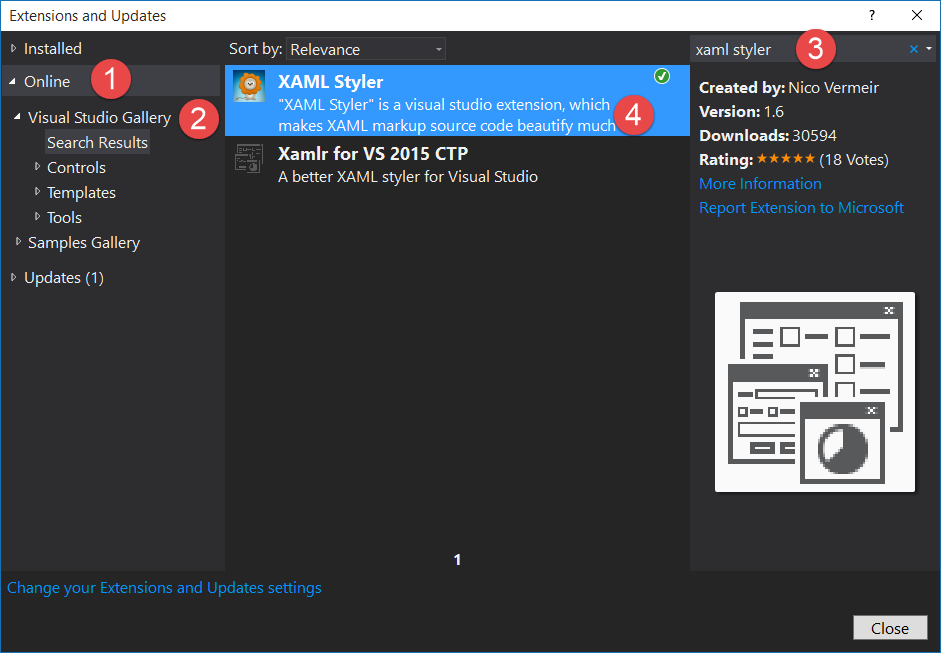
Go to the Tools Menu > Extension and Updates…
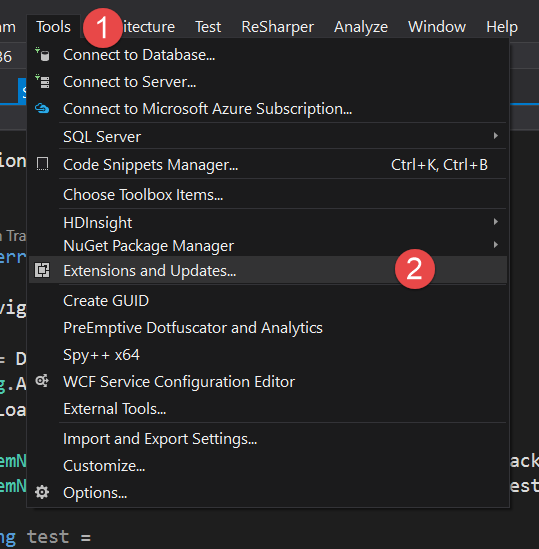
Then pick Online > Visual Studio Gallery > type “XAML Styler” in the search box and install XAML Styler
2.2. Configuring the properties
Go to the Tools menu > Option > scroll all the way down and pick XAML Styler
Set the properties as in the picture
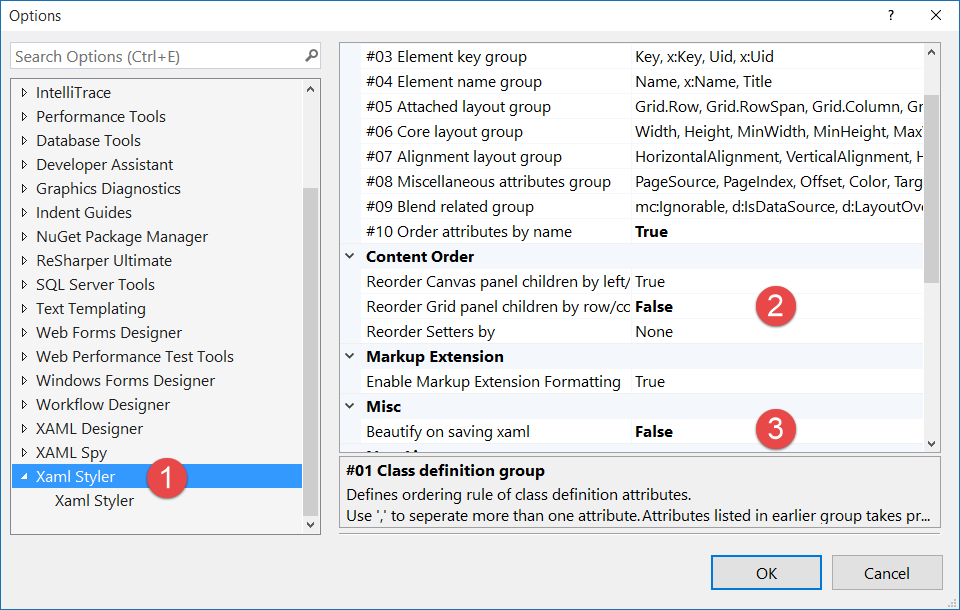
You’re probably wondering why they should be set that way :3. It’s just my personal experience for boosting productivity and reducing mistakes.
2.3. Usage
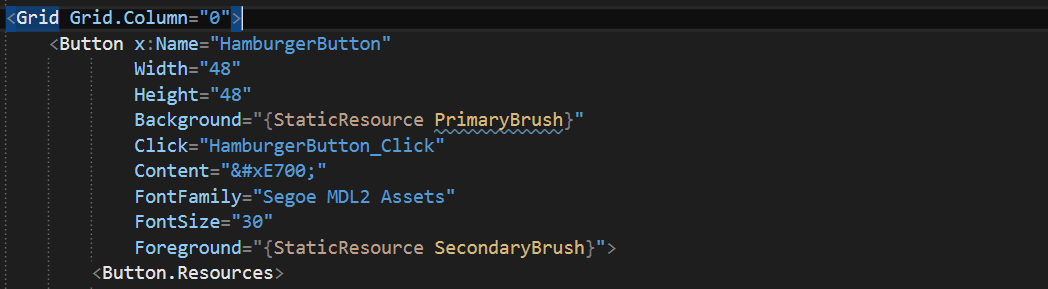
Using it is very simple: open your XAML code > right click > Format XAML
Before

After
3. Super Power 3: Indent Guide and C# Outline
3.1. Indent Guide
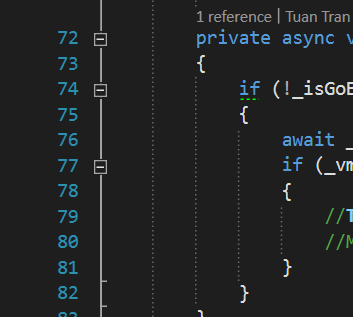
Looking at the screenshots so far, you’re probably wondering about those vertical lines in the screenshots that your Visual Studio doesn’t have. That is the Indent Guide Extension. Its job is very simple: drawing vertical lines so your code is easier to read, lined up properly.
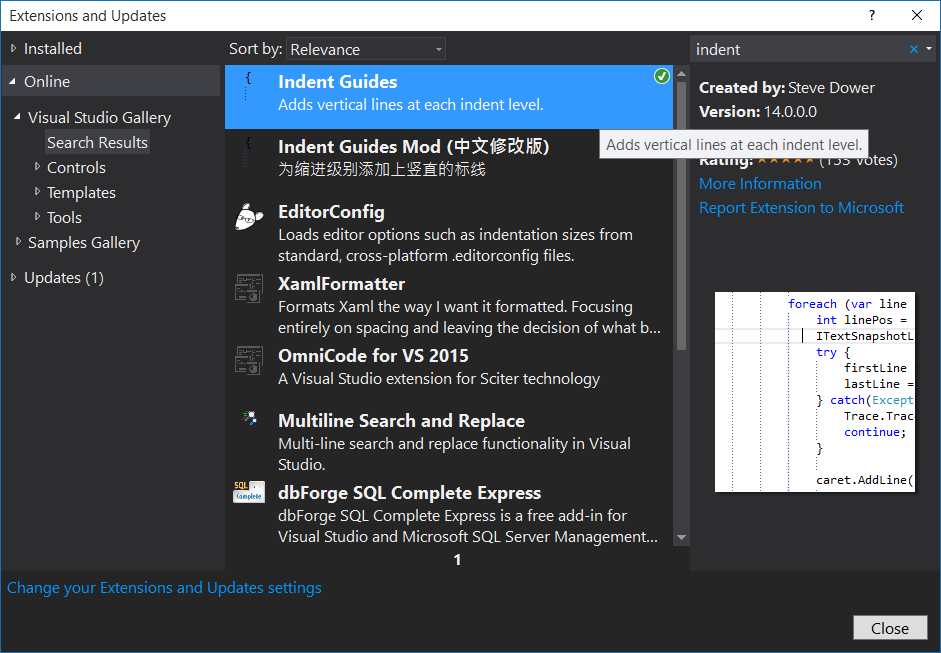
Right after installing, restart Visual Studio, open any Project and you’ll see the result
3.2. C# Outline
Looking at the picture above, you probably also found it odd that an if structure has a small “-“ for collapsing and expanding. That is the C# Outline Extension’s doing.
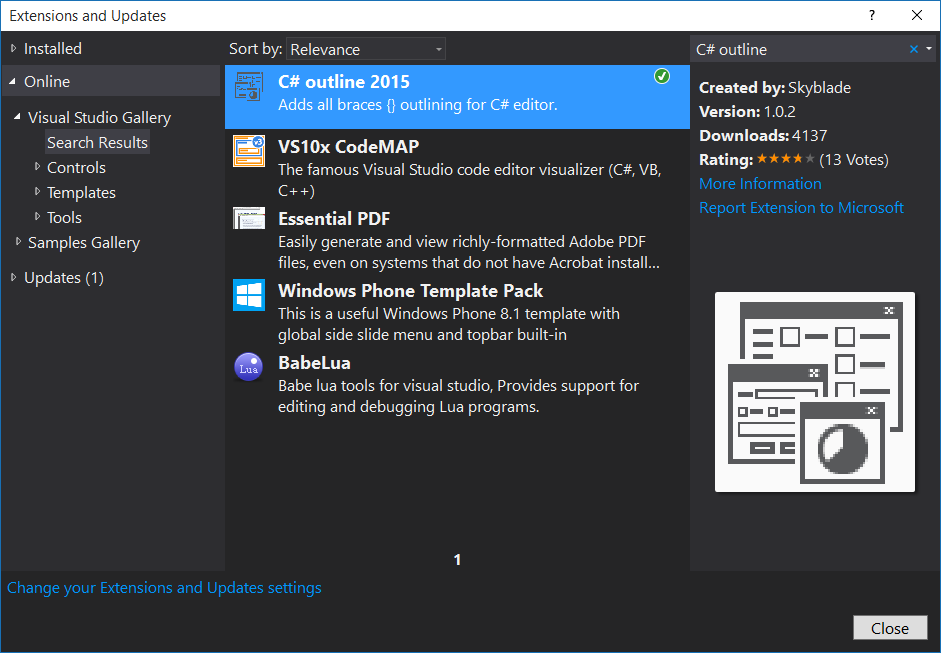
C# Outline gives you a code block at every curly brace. So you can collapse and expand all sorts of structures like If then else, while do, switch case, and so on and so forth
its official name is C# outline 2015, for Visual Studio 2015
That’s all — see you in the next post