[Research] - LaTex on Windows - Step by step installation
In this blog, I will instruct you on how to install and writing LaTex documents on Windows with ease.
1. Requirement
1.1 List of software
First thing first, you would need to download and install a series of software.
Choose the correct version with your windows (x86/x64)
- StrawberryPerl
- Visual Studio Code (text editor, not confused with Visual Studio IDE)
- MikTex (easier to install and use)
For me, MikTex is kinda difficult to download. The server close connection every 30-45 secs. If this happened to you, use a download manager. For example: Free Download Manager
1.2 Installing MikTex
Accept all default option, and wait for the installation completed.
Start > MikTex Console > Updates > Check for updates
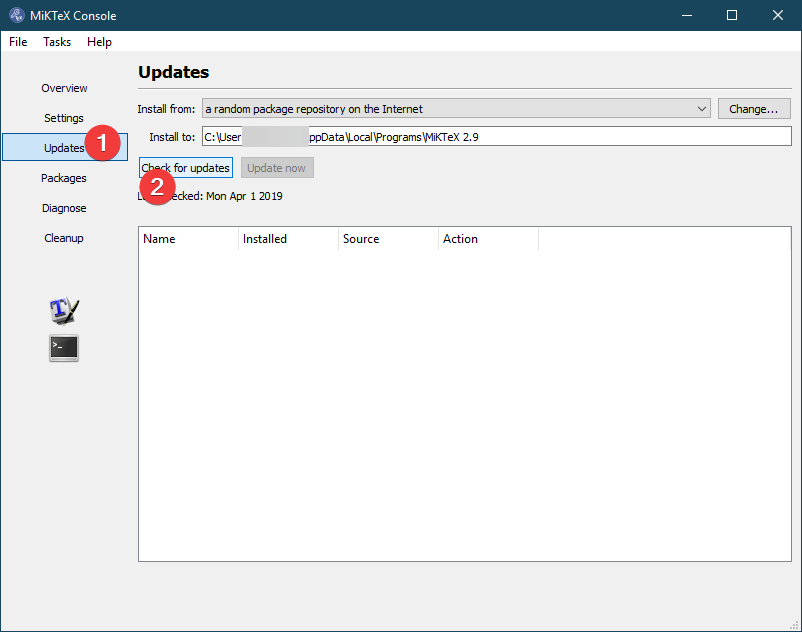
In case of difficult in download packages, you can change ‘Install from’ option with a
httprepository
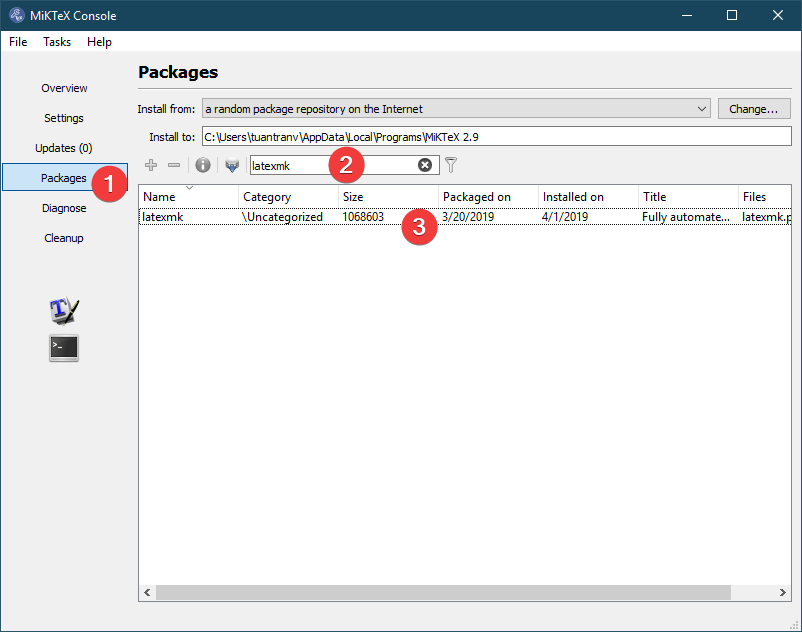
Install latexmk package
2. Setup on Visual Studio Code
If you are opening Visual Studio Code while installing MikTex and Perl ActiveState, please CLOSE Visual Studio Code and open it again.
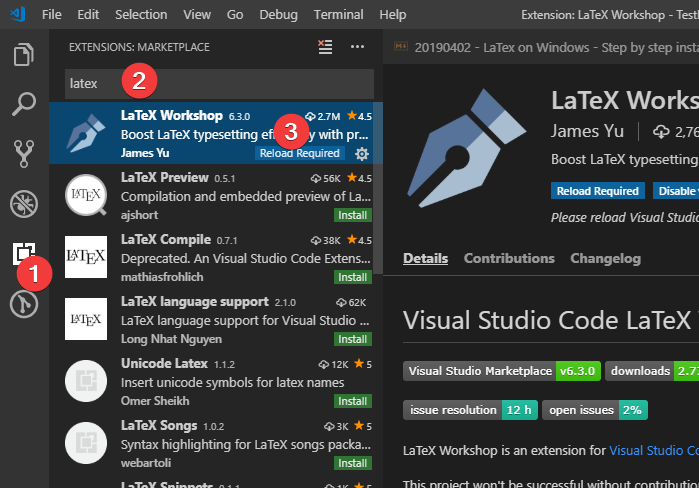
Open Extension > search for Latex > Install LaTeX Workshop
3. Writing on Visual Studio Code
It is recommended to create a folder for each LaTeX document (to store images, charts, data file, etc).
Open that folder with Visual Studio Code, create a new file ended with .tex
Open that .tex file, then you can start playing with your LaTeX
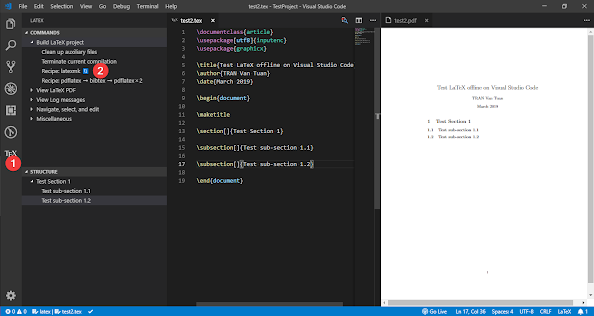
To preview the rendered PDF, you can click on small icon on the top-right corner

4. Collaboration
Okay okay, it’s cool, but why do I need to write LaTeX offline, using Visual Studio Code, instead of the awesome Overleaf?
The answer is the price. For collaboration, overleaf offer 80 USD/year for 6 students (the price is higher if you don’t have student account).
With visual studio code, it’s free, and super fast too.
4.1 VSCode Live Share
Live Share is an amazing feature offered by Microsoft. It’s not even share files, it’s also share folders and projects.
To begin with, install VS Live Share extension

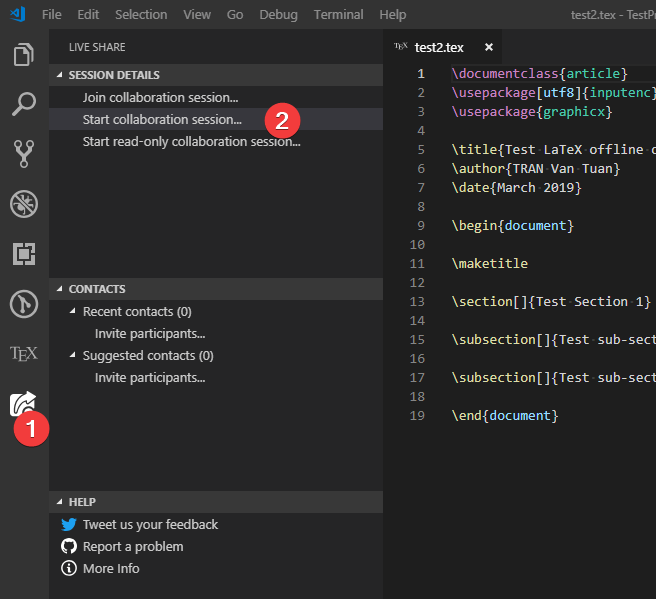
4.2 Start Collaboration
After installation complete, a new feature appeared in VSCode
Click on that Live Share feature, then Start collaboration session...
It will open a new website that require you login with either Microsoft Account (outlook, hotmail, live) or GitHub Account.
For this tutorial, I will use my github account

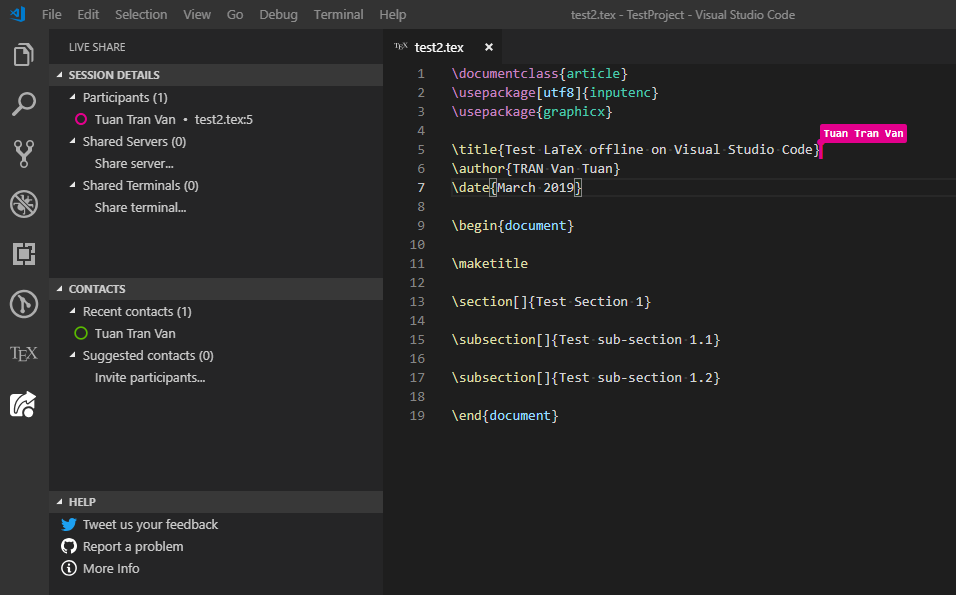
After authorized, Live Share will start working. You can paste the generated link for other users

4.3 Join a shared collaboration session
If you are not the one who sharing, but the one who join, it’s even easier.
Open Live Share feature > Join collaboration session > Paste the link you have to the box appeared then press Enter
If successful, it should be like this
4.4 Live Share Maximum collaborators
The short answer: 5
For more information on when/how you can increase this number can be found here: https://github.com/MicrosoftDocs/live-share/releases/tag/0.3.788